Frequently Asked Questions
What is the Force Bleed function?
Force bleed control feature (on the Info palette) allows the user to create bleed even for files which do not contain it or cannot contain it (e.g. images). Activating this feature changes the behavior of trimbox and page bleed: It usually fits and aligns page trimbox to position trimbox – when this feature is active it fits and aligns page bleed to position bleed. If page bleed box is missing (eg. in pictures), the program works with the whole image and fits it to bleed of position.
Therefore, if pages for imposition contain sufficient bleed the imposition is done without activating "Force bleed" and bleed is created according to pages. If these pages have a small or non-existent bleed, activate "Force bleed" and set the desired bleed (it cannot be calculated automatically because the pages do not have it). Then set the desired height and width of positions and then selecting either "Fit" or "Fill" in the Scale palette. "Automatic rotation" in the Pages for imposition menu can also be used to set the same page orientation throughout the imposition.
 What Are Preset Impositions and Templates?
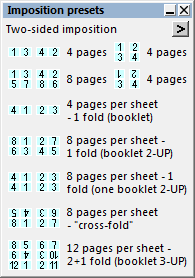
Using the preset impositions and templates can make your work much easier and faster. When you need to make a typical repetitive imposition using the presets can help you achieve your goal in a matter of seconds. The most common impositions can be found on the Imposition presets palette while the content and impositions on this palette changes depending on the one-sided / two-sided selection. It is therefore necessary to set this option first. After the selection is made you can select the imposition type and its appearance (row and column count, style, page to sheet assignment) will be assigned to the imposition you are working on. Any other adjustments to the imposition can be done manually afterwards without the presets settings changing.
Using templates is another option, while these can be premade or custom made by the user. When templates are used all other imposition parameters (marks, sheet size, positions etc.) are loaded from the template, not only the appearance of the imposition as in the case of presets. Template selection from the Last used list found in the menu on the Files panel is also a matter of seconds.
 How do I set Different Gaps between Rows and Columns?
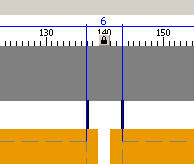
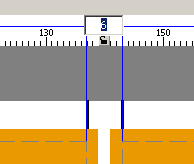
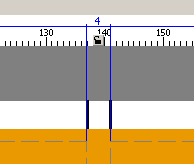
By default, spacing is calculated according to page bleed. It can, however, also be set manually in the Info palette which makes all the spaces between rows (or columns) equal. If you need to set them to different values, you need to display rulers (Menu->View->Show Rulers or Rulers button on the Main toolbar). The rulers show the width of columns, rows heights, spacing between columns and rows and imposition margins. It is possible to change these values by double-clicking them on the ruler. The locked lock symbol at the gap means that the gap size is selected manually and will not adjust automatically according to page bleed.
What is the 2-UP (or more) Imposition?
When you need to place a single page on a sheet more than once you can do so by either using the page repetition or by assigning the page to more positions (page to position assignment – it is possible to select more positions and assign the same page to all of them). If you already have your imposition containing more pages finished, e.g. a Booklet, the easiest thing to do is to duplicate this montage. You can do that by selecting Menu->Edit->Duplicate imposition below or side by side. You can also use the Duplicate button in the Imposition toolbar. When duplicating the entire imposition, you must deselect any selected positions first. You can do so by clicking on the desktop outside of all positions, using CTRL+D shortcut, or by selecting Menu->Edit->Deselect. If a position is selected, you will only duplicate the rows (or columns) where the selected positions are located. This imposition style can also be used for more than 2 pages.
 How Do I Adjust Trim Marks Placement?
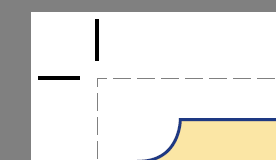
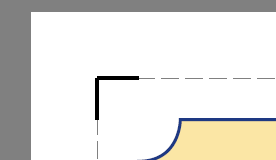
In some cases it is necessary to have trim marks inside the trim box instead of the usual outside placement when we want to cut our sheets manually. The solution to this problem is simple. On the Details of marks palette we set a positive value in the field called "Distance from trim" to place the marks outside and a negative value to place them inside. The distance is equal to the marks length in the pictured case.


